
Are you looking for ways to spruce up your home?
Renovating your bathroom is one of the best ways to increase your home equity. About a third of American homeowners want to remodel their bathrooms.
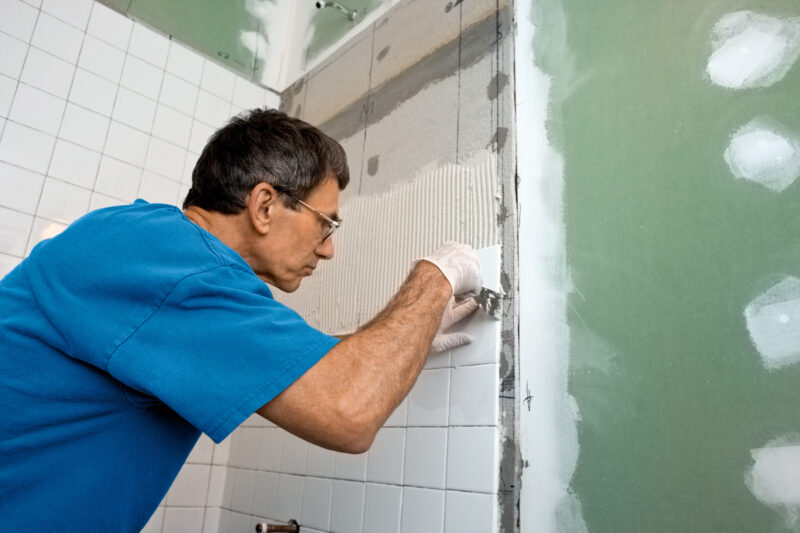
However, the biggest challenge for many is the cost. Even if you have no budget to hire a professional, you can take on a DIY bathroom renovation project. Without prior experience, you might find it hard to find a starting point.
The best place to begin is with your bath and shower. Continue reading below for bathroom renovation tips:
Removing Your Old Bathtub
Draw up a bathroom floor plan to serve as your guide for your DIY bathroom renovation. Prepare a wrench, mortar, level, reciprocating saw, and tape measure.
Consider getting a Phillips screwdriver, replacement tiles, a plumber’s putty, and the new bathtub and plumbing. Begin by measuring the old bathtub. Get its dimensions and create a detailed floor plan for your bathroom.
Include all the drains, faucets, and other plumbing elements. Take note of the bathtub space’s width and length. Ascertain whether the drain is on the left, right, or center of the tub.
Use the saw to cut a panel on the wall behind the tub to get to the drain pipes. Look for the valve and turn it off to cut the water supply. Find the screws underneath the faucet connecting to the wall and unscrew them.
Next, remove the primary and overflow drains. You may use a removal tool to loosen the drains on the front of your tub. Disconnect the waste-and-overflow unit.
Go back to the panel cut on the wall to remove the drain shoe. It is a T-shaped connector used for holding the pipes. Use a pipe wrench for removing the drain shoe.
Remove the fiberglass or tiles on the walls surrounding your tub. After that, pull out the screws connecting the tub flange to the stubs and cut any remaining caulk. Get some help when lifting the tub from its place.
Installing a New Tub
Once you’ve decided to go for a bathtub replacement, then it’s time to start the work. Level the floor where the new tub will reside. Use your level and mortar to ensure the floor is flat.
Alternatively, you can use an underlayment to smoothen the floor surface. Position the new tub against the spot of the old tub.
Trace a line on the studs and align it with the height of the flanges. After marking each stud, remove the tub from the alcove.
Take the tub and set it on its side to access the drains. Get the bottom drain and insert it through the hole. After that, screw it into the L-shaped pipe fitting before doing the same with the overflow drain.
Next, use a hacksaw to cut the pipes to your desired length. Secure the pipes and drains using ABS glue and sealant.
Slide the new tub into the slot. Make sure the drains and flange match up to the fixture. Re-attach the drains and place a generous amount of caulk or plumber’s putty around the perimeter.
Give the caulk or putty and mortar 24 hours to set. Re-attach the faucet, turn the water on until it fills up, and check for any leaks.
Adding a Handheld Shower
Replacing an old tub will increase your home value, but adding a handheld shower makes your bathroom more desirable.
The simplest way is to replace the default bathtub spout with a specific diverter spout. It will connect with the handheld shower featuring a flexible hose and a spray head.
It is only possible when you have a waterproof wall. If your tub alcove features fiberglass, acrylic surround panels, or ceramic tiles, you are good.
Most handheld showers have wall-mounted brackets. It is where you will hang the showerhead when not in use.
A New Shower to Your Existing Bathtub
Do you wish to retain your old tub? If so, learning how to install a new shower to an existing bath is another option. It can be tricky since you need the “wet wall” containing the plumbing.
After taking down the wall, remove the old faucet valve. Replace it with a new valve with a shower riser and spray head. Re-tile the wet wall and cover it with a new surround panel.
What to Avoid in a DIY Bathroom Renovation
A bathroom renovation is safer and cheaper when you avoid some crucial mistakes. First, never start your project without a clear plan. Every incorrect inch, measurement, or detail inside your bathroom can spell doom for your project.
Another common mistake is spending on expensive options despite affordable alternatives. It is easy for shiny and glamorous fixtures to attract you. However, keeping things simple will still yield your desired results.
For example, a framed shower unit will cost less than a frameless one. If you can live with it, drop the frameless option immediately.
Stay away from stone floors and quartz counters when plain tiles and counters already pass your standards.
Never neglect your bathroom ventilation. After all, it is a place to relax and recharge. A new tub and showerhead will not do much if your bathroom has poor ventilation.
Invest in a good bathroom fan to keep mold and mildew at bay. Alternatively, you can place some heat lamps to reduce air moisture.
If you have more than one bathroom, avoid starting with your primary one. Renovate the smaller rooms. It will serve as your trial and error project.
Lastly, know when to call a plumber. As much as you may want to complete your DIY bathroom renovation, problems may arise, often requiring professional expertise. They can also advise about renovating a bathroom and other plumbing concerns.
Expand Your Home Improvement Knowledge
Learning how to install a new bath properly will bring many benefits to your home. It spruces up your property and increases its resale value. However, you have a lot to learn beyond a DIY bathroom renovation.
Are you looking for more guides? If so, read our other posts today.